Sewing a Circle Tutorial
Hello, I decided to open by teaching you how to sew a circle. When I decided to make my first quilt I really liked circles and thought it would be super easy. But to my surprise there really was nothing out there on how to do it and I didn't know much about sewing. However I was very fortunate to have a great friend who knew how and was willing to teach me. Cristy Fincher is a great quilter and has her own tutorials on Youtube as well as a online shop full of great tools and patterns to help you get going as well. You can find her at http://purpledaisiesquilting.com/
Now for this tutorial I used a pattern out of the Modern Bee: 13 Quilts to Make With Friends by Lindsay Conner. In the book they use pins to pin the circle and sew. I do not like pins, they are not friends with my finger tips and I find that my finished product has lots of puckers. This can be very frustrating and time consuming. I hope this picture tutorial helps you.
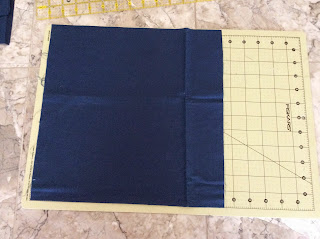 you will need to cut your background fabric and your freezer paper to the unfinished size of your block. You will need to trace the finished size of your circle onto the freezer paper and cut the circle out. Iron your freezer paper, shinny side to wrong side of fabric.
 You can not cut the fabric out inside the circle, be sure you leaving a half inch hem allowance.

 You will need to cut notches into your circle about half an inch width all the way around leaving a quarter inch between your cut and the freezer paper, careful not to cut to the freezer paper. Pictured above. For the next step you will need your iron and starch spray. If you do not have the starch you can use water, but the starch will keep things nice and flat. You will spray your fabric and push it over your freezer paper as close to the edge as possible and press. This will be the line you follow when you sew, so be sure it is flat and straight.

 In the second picture below you will notice its not laying flat, this is because I was out of Starch and I wasn't in the mood to go get some. My crease is still nice and visible so I'm ok with that. For this block I was asked to piece the center of the circle, she wanted it to look like a baseball (it turned out super cute). If you are piecing or using a solid piece be sure the piece is big enough to cover your circle all the way around. Do not worry about making it into a circle, we will get to that later. You can use a glue stick or elmers glue (the glue washes out nicely). If you decide to use elmers glue Christy and Purple daisies sells tips so you don't have big glops of glue everywhere (mine was no where to be found so I tried really hard not to glop it on).
Be sure you place your center piece over your circle making sure it covers all of it. Grab a section of your center piece and lift back so you can see your circle. Put a thread of glue as close to the crease as possible and flip your middle section over and press.
In the second picture below you will notice its not laying flat, this is because I was out of Starch and I wasn't in the mood to go get some. My crease is still nice and visible so I'm ok with that. For this block I was asked to piece the center of the circle, she wanted it to look like a baseball (it turned out super cute). If you are piecing or using a solid piece be sure the piece is big enough to cover your circle all the way around. Do not worry about making it into a circle, we will get to that later. You can use a glue stick or elmers glue (the glue washes out nicely). If you decide to use elmers glue Christy and Purple daisies sells tips so you don't have big glops of glue everywhere (mine was no where to be found so I tried really hard not to glop it on).
Be sure you place your center piece over your circle making sure it covers all of it. Grab a section of your center piece and lift back so you can see your circle. Put a thread of glue as close to the crease as possible and flip your middle section over and press.


 Once you have pressed your pieces together you are ready to sew. Yo will need to be sure to sew directly on your crease. Also be sure you are only sewing the outer edges, as pictured below.
 Once you have sewn your circle, be sure to trim up your seam allowance to a quarter inch. Now the fun part.... You can now pull off the freezer paper. Don't worry, you can pull the freezer paper off and everything will stay in place. Just be sure both pieces are sewn together all the way around. You may need to tug hard, it will be fine, I promise.
 It may still look a bit off,
 But once you straighten it out, and give it a final press on both sides, she will be ready to go.

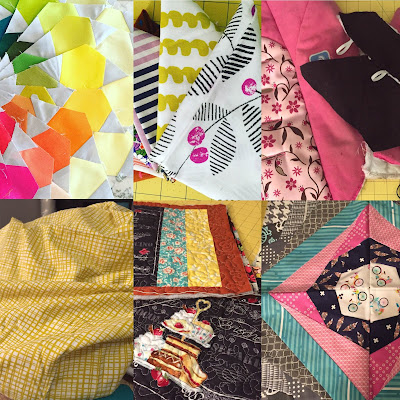
 I hope you find this helpful. Please post pictures of your circles, I'd love to see them. Below are a couple others I've made. Happy Sewing everyone!


.JPG) This next one is the one Cristy from Purple Daisies made with me, She even taught me how to applique the bird and I later appliqued the tree stump...
This next one is the one Cristy from Purple Daisies made with me, She even taught me how to applique the bird and I later appliqued the tree stump...


.JPG)

Comments
Post a Comment